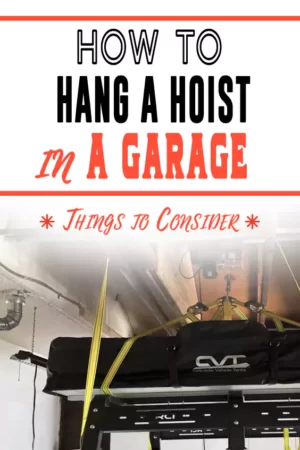
Being able to hoist items off of the ground in your garage may help you with certain projects, like working on a car engine.
Here are a few things to consider when considering if your garage can accomodate a hoist.
- Get the proper measurement of your floor joists if you want to hang a hoist in your garage without challenges. Use tape to measure your garage roof trusses and the floor joist to determine the location of the hoist.
- Consider adjusting the measurement if you have a different opening, but a 36 beam is ideal for most garage roofs.
- Ensure your garage braces support the hoisting weight. If the braces cannot support the hoisting weight, you’ll have issues hanging the hoist from rafters.
You can assemble the H frame without issues with the correct floor joists and roof trusses measurement.
Then, you’ll install a garage hoist to lift heavy load types if you follow the proper guidelines.

Can I put a hoist in a garage?
If your garage braces can handle the weight, you can put a hoist in your garage.
If you want to lift heavy materials in your garage, consider putting a hoist in the space. However, the construction of your garage ceilings is integral for installing the hoist.
If your garage has a top floor, you’ll have joists across your ceiling and supporting the floor weight. Most home ceiling joists usually have 2×4 beams to handle the load.
Furthermore, you’ll have trusses replacing joists if your garage does not have a top floor. A truss is a structural component designed to support your roof structure. In addition, they provide support and can carry a specific amount of load.
How to Hang Hoist in Garage
Using the right tools will streamline the process and prevent joist or truss damage.
Required tools
- Tape measure
- Jigsaw
- Hammer
- Screwdriver
- Miter saw
- Pipe wrench
- Drill with bits
- Screws
- Goggles and gloves
If you take the wrong measurement of your garage roof trusses and floor joist, there will be challenges. It would be best to use a tape measure for accurate measurements.
Step 1. Measure the floor joists and roof trusses
Your first task is measuring your garage floor joists and roof trusses. This step is essential because it helps you determine the location of the hoist.
A 36 beam is ideal for most roofs but consider getting a more extended bar if you have a flat roof.
Furthermore, it would be best to find where the roof peaks. Mount the pipe in both locations for even pressure on the trusses on either side of the roof.
Now that you have an opening measurement, you can install the “H” frame.
Step 2. Build and Install the “H” frame
You can cut the pipe after creating an opening measurement. Consider testing the deep pipe threads and adjust at the store to ensure you have the suitable material.
Next, it’s time to conduct a test in the truss by assembling the frame. Ensure the wood aligns and covers all mounting holes and bolt it.
It would be best to hire some help because of the frame weight. Furthermore, it would help if you had someone to hold the frame while drilling the holes.
After drilling on each flange, insert the bolts and tighten them with a screwdriver. Now you can focus on installing the motor.
Step 3. Install the motor
When you install the hoist on the frame, ensure the balance is at the center. After the installation, it’s time to play the cable until it touches the top of your ceiling.
Consider marking the point and cutting out the opening with a jigsaw from the top. A cordless jigsaw like the Makita VJ04R1 12V* works well for cutting openings like this.
Protect your hands and face from falling debris with goggles and gloves.
If you position the hoist on the roof correctly, it relieves the truss roof of additional stress when carrying the load.
Most trusses can handle loads weighing 400 pounds without damaging an evenly distributed weight. Now you can focus on connecting the platform with the hoist cable.
Step 4. Build the platform

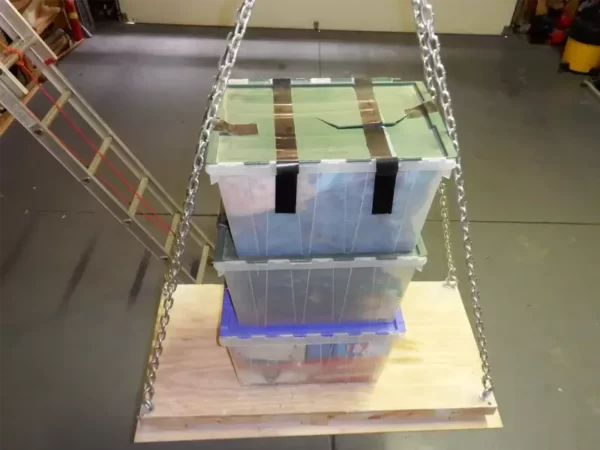
There are various platforms compatible with your hoist cable. For example, a series of chains can successfully connect with the cable.
These chains have various 2x4s with plywood on the top. In addition, you’ll find a 1/4″ plywood skin will give the platform a finished look.
Finally, the bottom has three members that allow bolt tightening and leveling the joist’s base with the platform top.
Now flip the platform and attach three 2x4s straight with the first six. Move a couple of inches apart to give the eye bolt nut some room and bolt. It’s time to create a hole in each plywood corner.
Please pay attention to the eye bolt during installation and ensure it does not edge out the platform. Now place the flexible plywood at the bottom and tighten it with screws.
Consider using fender washers to make the plywood sturdier. After setting up the platform and attaching eye bolts to the chain, you can hook it all up and conduct a test. Every time the platform goes close to the ceiling, change settings to avoid accidents.
Hoist vs Winch
Understanding the difference between a winch and a hoist is essential as they differ in function and features. Both pieces of equipment come in handy in workshop environments to improve productivity. There are similarities but significant differences:
Operations
When it comes to operations, a winch and hoist differ. For example, you can vertically pull items across a leveled surface with a winch. But the case is different with the hoist. You can suspend items in the air with hoists.
So consider using a hoist if you want to lift heavy objects. But if your activities involve pulling loads, the winch is your go-to machine.
Braking system
Another significant difference between both tools is the braking system. Winches have dynamic breaks to roll loads instead of lifting. In addition, winches have an automatic lock that springs into action when pulling a load.
But hoists have in-built mechanical brakes to lift and lower items. The brakes support the lifting of loads and are best suited for vertical lifting.
Summary
Review the discussed guidelines if you also want to hang a hoist in the garage. It will help if you follow the methods to avoid damaging the joists or trusses.
*Paid Link: As an Amazon Associate, I earn from qualifying purchases. Should you decide to purchase a tool through this link, I will get a small commission. The price of the tool won’t be any different to you.
Recent Posts
Many DIY lovers and engineers want to build something cool in their garages. What's cooler than a kit airplane? In this setup, the builder receives parts and puts them together in their own space....
Diamond blades have various uses, from cutting tiles and glass to cutting gems and semiconductor materials. If you’re planning to start a renovation or building project, you’ll need a diamond...
