
Bostitch air compressors come with many benefits compared to their brands. One of the main advantages of a Bostitch air compressor is that it’s easy to use.
Most users prefer to use this device in their homes because of its high performance. Its design and color blend will suit your home’s beauty.
In addition to being noise pollution-free, this device comes with a cushion to help resist impact. As a result, you don’t have to worry about worksite and cavity damages. You can use the air compressor to regrip a golf cart, HVLP painting, plasma cutting, and so on.
Bostitch air compressor can also be used to fill an HPA tank, gas cylinder, motor tires, balloons, or other sunken surfaces.
The device is ideal for any small or large task, making it outshine the other air compressor types. Using it is no different from the other air compressors.

User Guide of Bostitch Air Compressor
Before we go into details on operating a Bostitch air compressor, we’ll look into the accessories that come with this device. For every use, you’ll need to attach a specified accessory to the compressor.
The stapler
It comes with two triggers. One is for safety while the other presses the trigger forward. You will find all recommended staple types to use written on its side. Inserting the wrong staples may not cause anything serious, but it can jam the stapler.
It also shows you where the pins will come out from to help you align them with your project.
To use the stapler:
- Connect it to the quick connect of the air compressor.
- Put in the stables and place it on the wood workpiece that you want to stable.
- Ensure the staples’ location will come out from is on the exact spot you want to staple.
Then put on your eye protection goggles as the staples or other particles may enter your eyes during the process. Next, press the safety trigger first, then the other for pressing the pins onto your workpiece.
If you need the staples too deep, increase the pressure from the compressor’s air pressure gauge.
Nail Gun
It gets used to press nails through your workpiece. The nail gun also staples like the stapler, but the staples used are thicker and larger. Using it is straightforward. You only need to connect it as we did with the stapler above.
If you want the nails to go deeper into the workpiece and maybe connect two pieces, adjust the pressure gauge to produce more pressure. If you want the nails not to go deeper, reduce the pressure.
Like using a stapler, you will need to protect your eyes as particles or nails may astray and harm you.
The Brad nail gun comes with an air outlet on its upper side. You need to adjust it to the direction in which the out coming air will go. Otherwise, you will have it blowing your project or face, making you uncomfortable.
It comes with a staple area that snaps open and closes easily. You will need to look at the tool’s side to read the appropriate fastener gauge. The smaller the gauge number, the bigger the size.
For this device to shoot, you will need to press the trigger and press the shoe onto the material you’re working on.
One Finishes Nailer
It looks exactly like the nailer gun except that it’s smaller in size. It gets used for nailing finishing nails onto the workpieces. The process of connecting and using it is similar to the other two accessories discussed above.
Two Pumps
One pump is small and looks like a small gun. It gets designed to spray air to clean things like dust from cracks or small places or sand from a sanding project. The other pump gets made for pumping tires, and it contains a gauge to control the pressure entering the tire.
You will need to connect these pumps to the compressor the same way we attached the other tools. You can control the amount of air going in by adjusting the compressor’s air pressure gauge.
How to Use a Bostitch Air Compressor – 11 Steps
Step 1: Prepare your Worksurface
The first thing is to ensure that your workplace is secure for carrying out the process. It should be stable and spacious.
Step 2: Collect all the Necessary materials
Ensure you assemble all tools and materials required for the procedure. You should have the following items;
- Bostitch air compressor
- Accompanying accessories
- Workpiece
- Eye protecting googles
Ensure your Bostitch air compressor gets securely placed on the work surface.
Step 3: Identify the Accessories

As pointed out earlier, a Bostitch air compressor is a multipurpose tool. The kind of work you want to perform will direct you on what accessory to use on the air compressor.
For example, you cannot use a small pump to fill in your car’s tires. You will require the other bigger pump with a gauge.
If you want to staple your workpiece, use the stapler, Brad nailer gun, or finishes nailer. To determine the best one to use between the three accessories, you will need to identify the kind of finish nails or fasteners to use.
Step 4: Put on the Air Compressor
When you identify the accessory to use, put on your air compressor. It will stop automatically when it builds up enough pressure as per the set PSI.
Step 5: Connect Compressor’s Quick Connect
Take the accessories you want to use and connect them to the compressor. Ensure you have loaded it with the appropriate and enough fasteners.
Also, inspect to ensure everything is in its proper place before starting using it. Adjust the air outlet in the right direction.
Step 6: Set the Workpiece
Ensure the workpiece sits securely on the work surface. Then align the place to fasten, staple, nail, or add air pressure with the accessory’s outlet.
Step 7: Protect your Eyes
In this step, you are about to start singing your compressor and its accessories. The possibility of particles and dust blowing into your eyes is high. Put on your protective eye goggles to prevent damaging your eyes.
Step 8: Put on the Attached Accessories
Press the trigger on for the accessory to perform the task. Ensure you apply pressure when using any of the accessories for optimal results. You can adjust the air pressure to achieve the results you want.
For example, if you require to nail the finish nails deeper into the workpiece, increase the pressure via the compressor’s pressure gauge.
Step 9: Disconnect the Accessories
After you finish performing your task on the workpiece, disconnect it from the compressor’s quick connect.
Step 10: Switch Off the Compressor
Now that the air compressor has finished its work, you will have to switch it off. For the compressor powered by electricity, put off from the switch and unplug it.
Step 11: Store the Accessories Used
After disconnecting the performing tool, please keep it in a safe place to protect it from any damage.
The above procedure illustrates how easy a Bostitch is to use. No wonder it’s a favorite for many users. The secret to optimal results from this machine is by knowing the required pressure for your work.
How to Adjust the Air Pressure on a Bostitch Air Compressor?
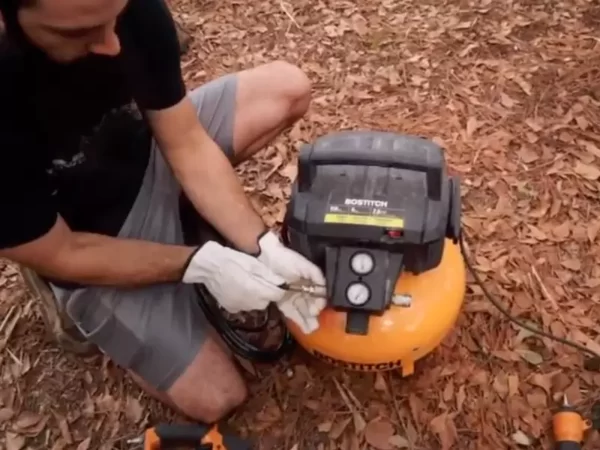
The compressor comes with two air pressure gauges. One is for regulating the tank’s pressure, while the regular gauge is for the pressure into your tools. In front of the two air pressure gauges is a component called the ‘dial.’ It regulates the air gauges.
Various tools use different air pressure. Use the dial to adjust the air pressure to the correct level based on your use accessory. When you put on the compressor, it automatically fills the tank with air pressure to the machine’s PSI.
For example, some Bostitch air compressors come with a 150 PSI. When it fills the tank with that amount of pressure, it stops automatically.
When you connect your tool and starts running it, the air pressure inside the tank begins decreasing because the accessory is using it. After the decreasing amount reaches a certain level, the compressor refills itself automatically to 150 PSI. This feature makes the Bostitch air compressor very convenient to use.
Also, you can connect two air compressors together in parallel to increase CFM.
After you finish using the compressor, release the remaining air in the tank. You will not allow the pressure to remain in the compressor’s tank after using it because it may damage the tank if it contains some moisture. Pull and hold the pin located in the pressure relief valve to let the air out from the tank.
How Do I Turn on My Bostitch Air Compressor?
First, plug its power cable into a reliable power source. Then locate the compressor’s On and Off switch around its head. Then switch it on to the auto position. It will start filling its tank with air pressure.
Please do not touch it while building pressure into its tank because it will regulate itself automatically.
When it reaches the set maximum pressure, the compressor will shut itself automatically. When you use the compressor and the air pressure gets finished, it will automatically switch itself on and fill the tank with air pressure.
The compressor will again stop when the tank builds the required pressure. The cycle continues until you finish your work. Don’t forget to drain out the remaining air pressure from the tank after using the compressor. Also, remove the condensed water from its outlet.
Among the many air compressor brands on the market, the Bostitch air compressor is most famous for its remarkable attributes, as explained above. The machine comes with various accessories to help the user perform multiple tasks.
As discussed above, you can use the Bostitch air compressor for your simple job projects or large industrial tasks. What’s impressive is that the machine is easy to operate and does not pollute the environment with noise while in operation.
The amount of time used in operating the Bostitch air compressor depends on the nature of your task. Like the large commercial projects, some may take much time, while simple jobs like tire and gas cylinder filling may take a few minutes.
Though it’s not hard to use a Bostitch air compressor, you need to be careful about doing it right. Otherwise, you may not achieve the results you expected.
Recent Posts
Many DIY lovers and engineers want to build something cool in their garages. What's cooler than a kit airplane? In this setup, the builder receives parts and puts them together in their own space....
Diamond blades have various uses, from cutting tiles and glass to cutting gems and semiconductor materials. If you’re planning to start a renovation or building project, you’ll need a diamond...